I was never that much of a nature girl when I was growing up, I guess. I always loved animals, but I don’t think anyone in my family would have guessed that I would grow up, quit a hard-earned administrative job, and become a homesteader.
My husband and I have a small-but-growing-more-efficient-by-the-day homestead, and we’ve been working very hard at it for about seven years. During that time, we’ve gone from first having just a small organic garden to raising a very large organic garden, a blueberry patch, strawberry beds, chickens we hatched ourselves, and ducks. And this year we finally added our long-awaited asparagus.
I told my husband, “This is the dawning of the age of asparagus.” To me, planting asparagus means we’re here to stay.
As one might expect, farming things has brought me closer to nature than I ever thought I would be. I hug our Maple tree, talk to the beans and tomatoes, and love hanging out with chickens and ducks. Many of them have fantastic little personalities. Some can be a little rude. In fact, our little hen Butternut just pecked the heck out of me over and over while I was feeding people corn. I don’t even know what she was doing, but I am still thankful to know her.
And I am thankful for this change in myself.
In these past years, I have gone from being the woman sitting through endless meetings to the woman who gets to grade student papers at night and spend her days digging in the dirt, planting seeds, saving seeds, and making jam. I have learned to have so much respect for nature and the way nature works to give us amazing gifts. Humans just have to work some and give nature space to do her thing, but the gifts are there and ready for us.
I’m also thankful for the opportunity to live closely with animals and see how they respond to the world around them, to nature, and I have learned that what impacts our animals often has a direct impact on me.
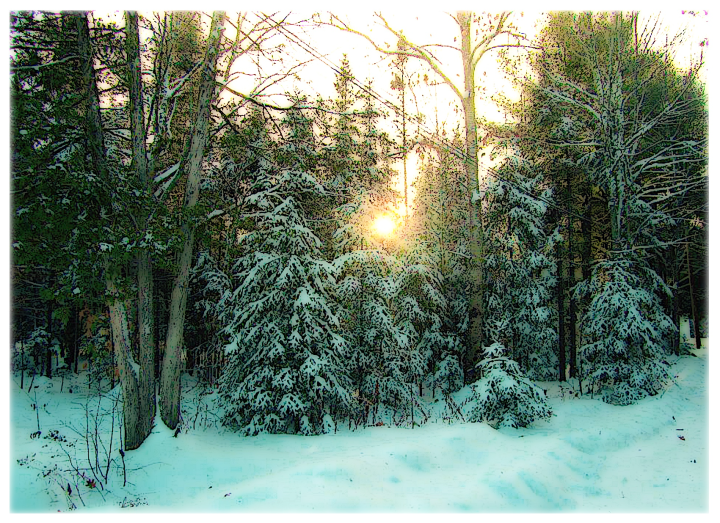
The winter and our short days and long nights here in Maine give me a perfect example. Some of our hens are older, so they slow down or quit laying in the winter. I can’t blame them. Some days, the weather is miserable. I wouldn’t lay eggs either. Plus, it takes 14 to 16 hours of daylight for a hen to make an egg, so winter is no fun for our hens and means fewer eggs for our family.
But the winter solstice gives me hope for the light—and happier days for our hens and more time in the sun for me. Just as it seems the dark comes so quickly after summer solstice, I love that the light comes back so quickly after winter solstice.
Winter solstice brings the light, and that brings, for me, eggs, happy hens, happy ducks, gardening, fresh berries, and more.
I am so thankful for the solstice. I know the light is coming.
I wish you the very best winter solstice. It seems to me that, this year especially, we all need the light.
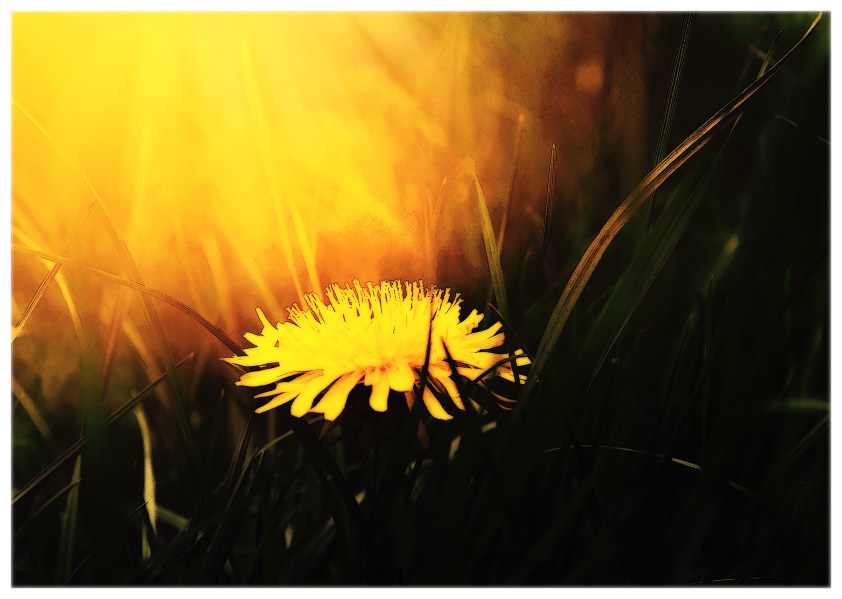
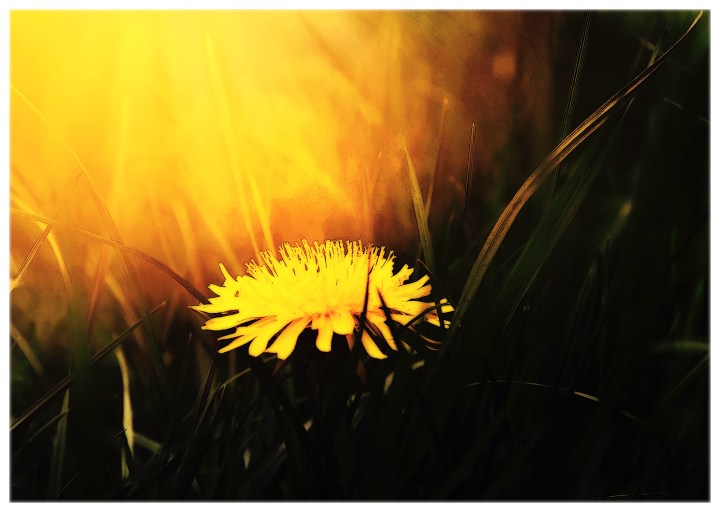
When I was growing up, I was taught that dandelions were dreadful “weeds.” I remember picking the beautiful yellow flowers only to learn from adults that they were “just weeds,” and I remember getting into some trouble for blowing on the dandelion seeds because I was spreading them in the yard, which was definitely frowned upon. I remember learning to spray chemicals on the dandelions as a child, and this was something that I carried into my adult life—and then I learned better.
I don’t know when Americans started to hate the dandelion, but according to my research, it was sometime in the 20th century with the invention of lawns. Apparently, someone wrote a book about the “perfect” lawn and identified dandelions as the enemy.
However, dandelions have a long history of being important to human culture, and we definitely need to let go of those notions of the “perfect” lawn. I just can’t see that those notions do anyone any good—not us and certainly not Nature.
My own epiphany about the usefulness of the dandelions came one day when I was making a salad from a giant container of mixed greens I had purchased at the grocery store. I look at the greens and realized there were dandelion leaves in the mix. I checked the ingredients list and found out that, indeed, I had just paid money for leaves that I could easily go get from my back yard.
Then, I learned that bees need the dandelions. They are the bees’ first food, and goodness knows the bees need every little bit of help we can give them. It’s a wonder of the world to me that humans can be so short sighted, and our history with bees is a prime example of this. However, that’s another story for another day.
Photo credit: Stefan Steinbaur, Unsplash
So instead of working against Nature, let’s embrace it and embrace those little yellow flowers. There are many helpful uses for dandelions, so let’s try one of these options instead.
1. Leave the flowers for the bees and make or get your kiddos to help make a “Bees are welcome here” sign. After all, we really need those bees to be happy because what’s good for the bees is good for us in the long term. Then, you can just let the dandelions do their work of loosening the soil and fertilizing your lawn. It turns out that dandelions are actually good for your lawns.
2. Pick the dandelion leaves for your salad. This is the simplest use I can think of. Instead paying for those dandelion leaves, make a salad from your backyard instead. It turns out that dandelions are healthier than many of the veggies we grow in our garden. According to this article from the Maine Organic Farmers and Gardeners Association, dandelions have more Vitamin A than spinach and more Vitamin C than tomatoes.
4. Finally, you can also make dandelion wine, though it takes a few months for the wine to ferment of course. But there are, apparently, a wide variety of ways you can use the dandelions for food, from jams to baking. Check out this article from Mother Earth News about some of the many ways you can take advantage of those little yellow flowers.
So think of the bees and what’s good for the planet and for you. Let those dandelions grow free in your yard this year!
My husband and I will be embarking on our fifth organic garden journey this spring, and this year, we’re planning ahead. Every year, we learn a little more about growing our own food, and while my husband specializes in the soil preparation in early spring, I specialize in dreaming about what we will plant and finding organic seeds from cool places.
Before it was even Christmas, my husband and I were talking about what new things we were going to try in the garden this year, how he was going to expand our garden area again, and how many rows of our tried and true favorites we would be planting.
And the truth is, while it seems early to be planning our garden for the summer while our driveway here in Maine is a giant sheet of ice, now really is the time to make your plans and order your seeds.
As you’re making your plans this month and dreaming of fresh strawberries and ripe tomatoes, here are a few things to keep in mind based on lessons our family has learned from our own organic gardening adventures.
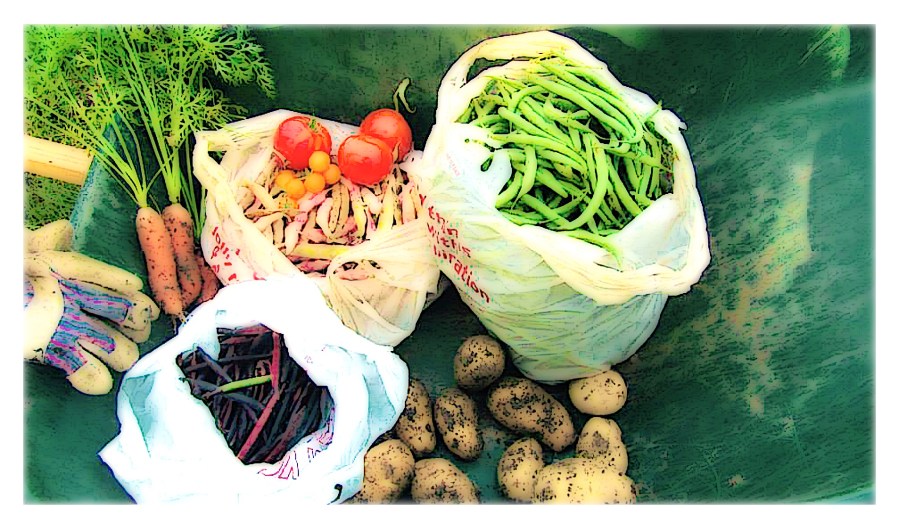
I took this picture during one of our first fall harvests. I had never had a garden and tasted food fresh from the earth before. I was hooked!
Grow Foods You and Your Family Eat
There’s nothing worse than working for months, cooking something up, and having your kids say “I don’t like that.” That has never happened too much for our family, but it is an issue I’ve heard others talk about. Thankfully, our boys seem to be big fans of the garden harvest, but I have made a few mistakes in terms of the kinds of foods I actually know how to cook.
After a few years of trial and error, we realized that our family really eats things like onions, green beans, dried beans, carrots, and potatoes, so these foods get more space in the garden. If we try something new, we usually limit it to a half row to give it a trial run before we take away precious space from one of our staples.
Remember Some Fruits and Vegetables Need Two Years to Harvest
There are some foods that are going to require some delayed gratification, and this is never easy for me. I’ve been wanting to plant asparagus for years, but I can’t seem to get excited about it because, if you want it to last for years, you have to leave it alone the first year. I’m determined to show some discipline this year and plant that asparagus, but you should be aware that there are some things you have to wait until the following year to harvest if you want them to do well.
Strawberries and blueberries should be left alone the first year as well. And, of course, fruit trees will take some time, depending upon the kind of tree you buy.
Consider Harvest Timing
The seeds you buy will come with instructions for harvest timing or you can research the days to harvest online. You should also keep in mind when the food will become ripe and ready to harvest. Is that during your family vacation or when you have to work extra hours at work? The first few years we grew our garden, we had to work so many hours during the fall harvest that some of our harvest spoiled, and our hearts broke.
Make Your Plan
Once you have considered what your family wants and needs and can handle, you should make your plan. And, since you need a good plan before you buy your seeds, it’s good to sit down and make a plan for exactly what you will plant, how many rows you will plant, and when those seeds need to be in the ground or started inside.
You should also think about if you want to start with seeds or purchase starter plants from a local nursery in spring or summer. We’ve found that things like green beans, carrots, and dried beans grow easily from seeds. But we’ve frequently purchased starter plants for things like tomatoes and broccoli. This year, I’m determined to do some starters inside for those foods, but we’ll see how it goes. I tried last year and still ended up buying starter plants. Our cat kept eating my starters!
Purchase Your Seeds
Once you have your plan, gets your seeds early. You wouldn’t think so, but if you wait until too late, it can be difficult to find some seeds that are really popular. This happened to us last year with our favorite dried beans, so we saved some seeds for this year. But, if you’re just getting started, this can be an issue. I recommend checking with local nurseries and coops to make sure you are getting access to foods that grow well in your area.
This year, I’m planning to write a series of posts about the steps our family is taking to plan, plant, grow, and harvest our garden. I hope you’ll follow me on our journey and share your stories as well.
I’ve always been the kind of person who is hesitant about making New Year’s resolutions, but I made a couple last year that I mostly stuck to. This has me thinking I might try this again. Last year, I resolved to simplify my life and to eat more plants. Although I still have progress to be made in both areas, as we begin a new year, I realize I am doing better in terms of living simply and eating more plants.
With this in mind, I am trying this whole New Year’s resolution thing again.
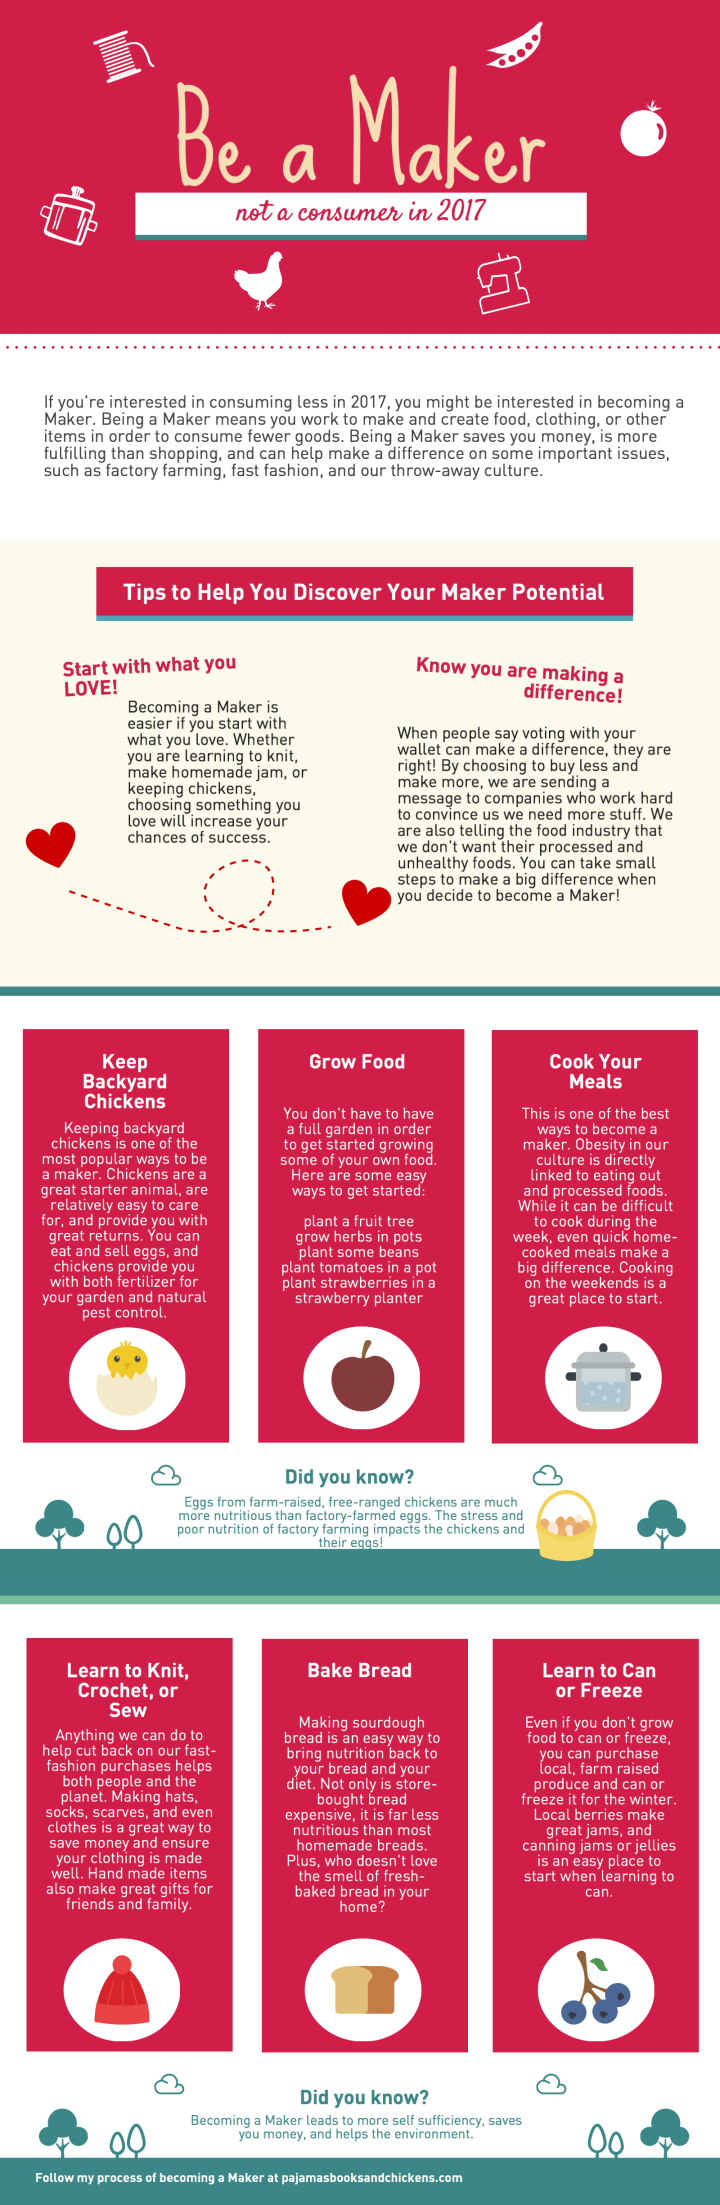
For 2017, my big goal is to become more of a Maker. You may be wondering what it means to become a Maker, and it’s a pretty broad term. Essentially, just making some of the things you need instead of being a consumer makes you a Maker. But there are, of course, varying degrees of Maker-ness.
I have been working on this for some time, but a few goals have eluded me. I am hoping 2017 will be my year.
Here’s some of the progress I have made so far:
I learned to crochet scarves, and we really use them.
I cut everyone’s hair in our family, and I am not trained in this endeavor. I just watched, learned, and bought some really nice German scissors.
We raise chickens for eggs, and my husband raises some chickens for meat.
I make home-cooked meals for almost every meal. This has saved us a ton of money and had made us healthier.
My husband is relentless about repairing instead of replacing.
And these are my Maker goals for 2017:
Learn how to knit. I want to make socks and hats!
Re-learn how to can jams and jellies. About 15 years ago, I was taught how and did it a little, but I think I’m just going to have to re-learn this year.
Plant apple trees.
And, because I love infographics, I made one to emphasize some of the many benefits of becoming a Maker and trying to leave those consumer ways behind. I also have a few fun suggestions, but I would love to hear more.
This year, we purchased some heirloom corn seeds in the hope of seed saving the corn this year. Last year, we planted a hybrid corn. It was delicious and grew well, but when we learned you can never repeat with a hybrid corn because you never know what will crop up, we decided to be done with hybrid seeds.
So with frugality in my heart and heirloom seeds in my pocket, we planted and grew a humble but still absolutely delicious heirloom corn.
We were worried about it for a bit. Well, my husband was worried. The corn ears were slow to grow, and it was getting late in the season. We had beautiful, giant corn stalks and not much in the ways of ears. My husband had watered extensively with “duck water,” so the corn had plenty of nitrogen, but he was really worried about the lack of ears.
I, however, was not so worried. Forever the optimist, I had a talk with the corn and asked the plants to please get busy and make some ears. I don’t know if it was that talk or just time, but those beautiful stalks began to produce many, many beautiful ears of corn!
After two weeks of eating corn almost every night for dinner, we realized we had better do some corn saving. We decided we would freeze our corn, so the following tips will be helpful if you go that direction. But I also have tips for seed saving and, well, just really making the most of your corn crop from top to bottom.
I mean, waste not want not, right?
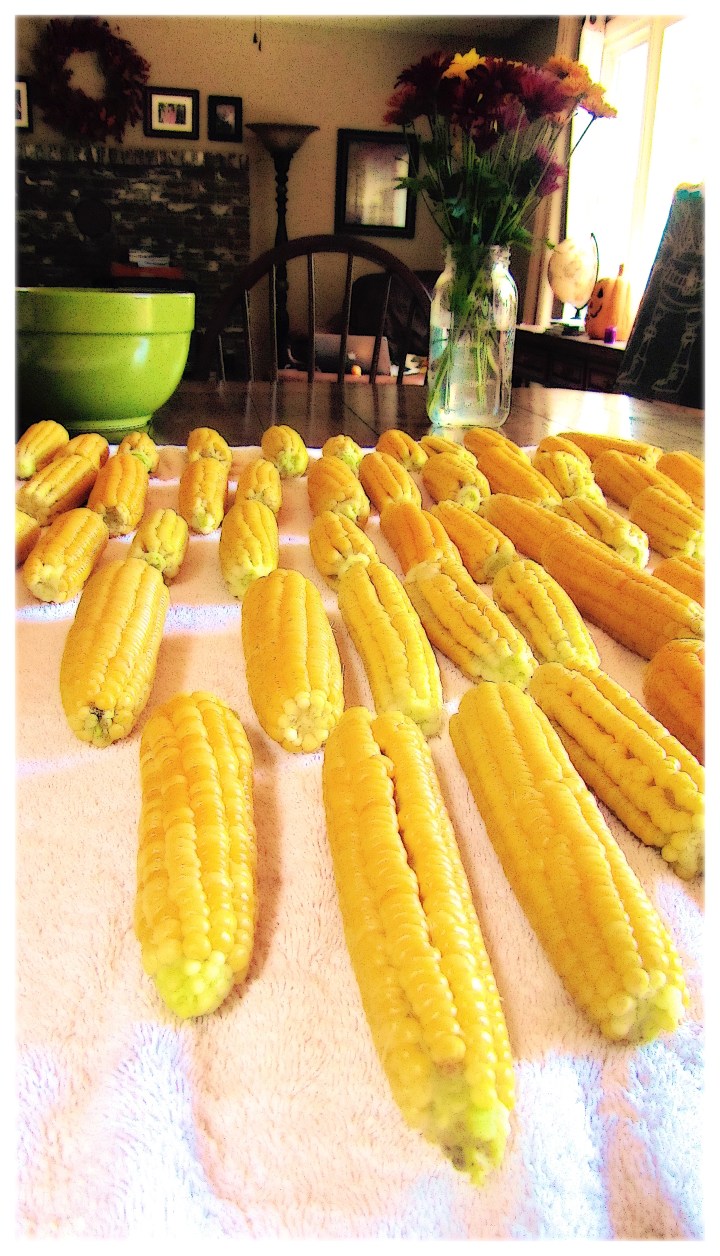
Here, the beautiful corn is drying after my husband blanched it.
Freezing
After you pick and husk the corn, you need to blanch it before you can freeze it.
Boil water in a large pot and place the corn cobs in the pot for 5 to 6 minutes.
Remove the corn and place into ice water for 2 to 3 minutes.
Let the corn dry and get your freezer bags ready for storage.
Using a knife or corn scraper (one of these gadgets is totally on my wish list), scrape the corn from the cobs. Place the corn in your freezer baggies and save.
Seed Saving
If you’re using heirloom seeds and want to save the seeds, you’ll need to leave several cobs on your stalks.
Leave the corn cobs there for about a month, though they will need to be picked before the first freeze (so watch the weather).
After picking the cobs, pull back the husks to expose the corn. You can braid the husks together to create a little group of corn.
Hang the cobs to dry fully.
Once the seeds are completely dry, you can remove them and then store them in a cool, dry place.
You are then set for planting next spring. I read that corn seeds can last 5 to 10 years if stored properly. That seems pretty amazing!
Sharing Leftovers
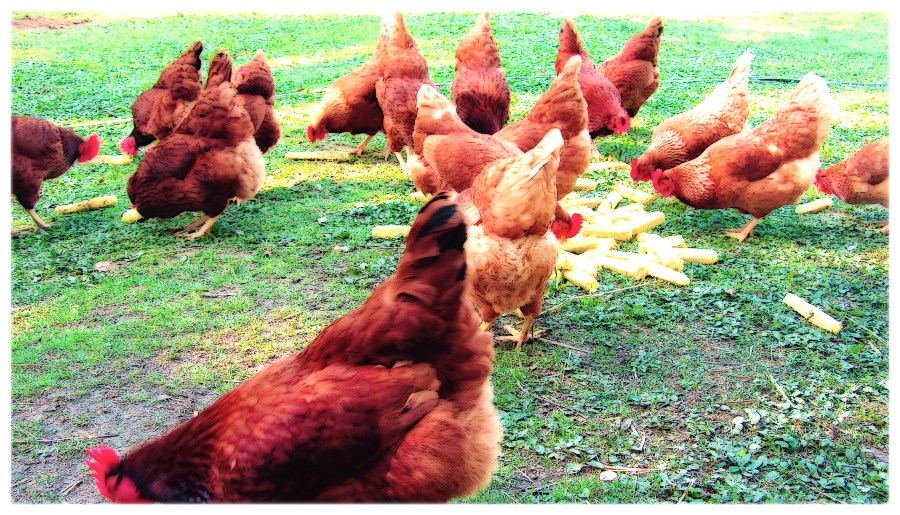
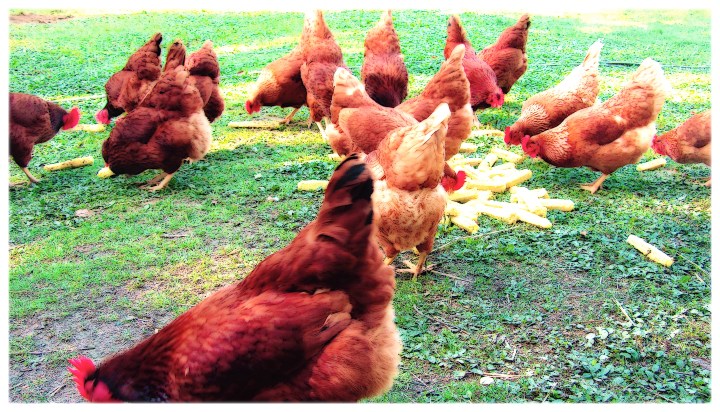
Before you throw away the corn cobs, which will surely have little bits of corn left on them, especially if you used a knife to scrape the corn cobs like we did, think if the chickens. If you have chickens or ducks, they will be in heaven with the leftover corn. If you don’t, ask your neighbors. You will be making some chickens’ days by sharing your leftovers. Trust me.
The girls were given 70 leftover ears of corn, and I have never seen them so happy. No sharing! Everybody could have their own piece–and then some.
Decorating
But corn is so awesome that there’s more you can do with it. Cut down your empty stalks (the ones not saving any cobs for seed saving) and decorate your front door or yard for Halloween in style and for free.
If you have more tips on making the most of your corn crop, please share below. I don’t know how to can yet, so if you have some tips or links to share, they would be great. Also, I have seen people used dried cobs to make lots of cool fall decorations. Please share your ideas below. Corn is pretty darn awesome!
If you remember way back to the beginning of the summer, I was doing some major planting in our garden. Because my husband was building a giant fence for our chicky girls, a lot of the planting fell to me and my teenage son, who is not nearly so outdoorsy as the rest of the family. And, after reflecting on my abilities as a gardener, I was pretty worried about this year’s crop. Mainly, my husband had been responsible for all of our vegetable garden successes.
It was up to me, and I was worried. I promised a report later in the summer, and somehow, it’s nearly fall before I am writing about our garden again. I feel like things have mostly been a success, but there were trials—and, boy, were they some trials.
Carrots are very, very, very difficult to plant. The seeds are tiny, tedious nightmares. Add that to the tiny, tedious nightmares biting you to death (black flies) while you plant in May in Maine, and I feel like planting carrots is almost maddening, like a test of wills.
Me versus nature.
This year, I didn’t let nature defeat me. I planted that darn garden despite the black-fly torture, and I think I was most proud when the carrot seeds were in the ground.
No, I was most proud when the carrot seeds sprouted. Every single seed seemed to have come up, and I was excited.
All was well. Or so it seemed.
Two days later, I went back out to the garden to check the progress of the carrots, and they were gone. Every single one of them. I was in shock. I stared at the ground for the longest time, not sure what to think, wondering if I was losing my mind. It was a tough day.
Our neighbor, who is a master gardener, didn’t know for sure what happened. She hypothesized and my research revealed that it could have been a rabbit, but it also could have been cut worms. All I know is that it was definitely a tragedy and a blow to my gardening ego.
But I would not be defeated, so I replanted. I suffered those tiny seeds and those tiny black flies one more time–and then just hoped and prayed.
Thankfully, the second round took, at least mostly, though we still had some seeds not come up. But we had enough, and, thankfully, we now have carrots to eat this fall.
This may look like an ugly carrot to some, but it is so beautiful to me. I only pulled one for a picture and a snack. We try to leave ours in the ground until after the first frost. It makes the carrots sweeter!
Overall, the garden has been a success—mainly thanks to my husband again. I may have planted and pulled some weeds, but that man is like my gardening hero with the watering, the hoeing, and the bug picking. Thanks to his work, we now have a garden ready to harvest, and I have begun a seed-saving routine that I hope will help us in years to come.
Each spring, we spend quite a bit of money buying seeds, and my newly-found frugality (as well as my inner doomsday prepper) has brought me fully into the seed-saving business this year.
If you’re interested in saving seeds, I think the key is to first focus on seeds that are easy to save and grow. For us, that means starting with the beans, tomatoes, and, yes–carrots.
Here are some helpful tips on seed saving on a few of the basics I think most people will find in their gardens (just be sure to start with non-hybrid seeds):
1. Green beans. In order to save green bean seeds for next year, just leave several bushes of beans to grow big at the end of the season. When the beans are big and lumpy and start to yellow, they are easiest to save. Just shell them and put them in a cool dry place to dry. I have saved green bean seeds for two years, and they work well.
If you let your green beans get old and yellow on the bush, you are set for seed saving. Here, you can see the pod is yellow, and the bean seed is ready!
2. Dry beans. Dry beans are the easiest because you are going to get them into shape for saving and storing anyway. We raise French horticulture beans, which are wonderful, and we tried pinto beans this year as well. The beans will get big and fat, and the pods will turn yellow and red. The key is that they need a chance to dry out. We have found that if we have a wet September, it will ruin the beans and cause them to mold. It’s best to pull the beans, bushes and all, and leave them in a place to dry. Just make sure you give them enough space. Mold is always the enemy here. Once the pods start to feel a little bit dry, you can shell the beans and then just spread them out to continue drying. Don’t put them away until the beans are completely dried. Then, in the winter, just make sure you save out enough for growing next spring. We have seed saved our French horticulture beans for three years, and they always come right up. Dried beans are the easiest, I think.
3. Carrots. Carrots are trickier. You can’t get seeds from your carrots the first year. You have to wait until the second year for them to go to seed. Leave a few carrots in the ground this year and then wait. You will want to cover the plants you keep with mulch to keep them warm enough. Next year, when the plants start to seed, let the seeds start to get brown and dry. It kind of looks like a little nest. Then, take the seeds and place them in a brown paper bag to continue to dry. Be careful with containers that trap moisture. Again, mold is the enemy. Once your seeds are totally dry, shake them in a bag to release the seed from the plant. Save them in cool dry place.
4. Tomatoes. We have been seed saving tomatoes before we even tried to. One year, I noticed that places where tomatoes had fallen to the ground and been left all year were growing tomato plants. It’s kind of amazing. But, of course, to do a better job and have great consistency, all you have to do is choose some tomatoes that are big and strong and squish them up. Add water and the squished tomatoes to a glass jar. The water helps the seeds separate. Then, place the jar in a warm spot for a few days. You should see a layer of moldy stuff start to form on the top of the mixture. Once you see the mold at the top and seeds at the bottom, you can remove the icky mold and run your mixture through a strainer to keep your seeds. Be sure to clean your seeds well and let them dry on a paper plate or something the seeds won’t stick to. You don’t want to use paper towels or paper, as the seeds may stick. Then, just store your seeds in a cool dry place like other seeds.
These are just a few of the basics I know, but it feels like a good place to start. As I learn more about seed saving, I’ll definitely share and let you know how it goes. And, if you know how to save some seeds, please share your tips here. It would be great to get a conversation going!
My little boy loves to play in the seeds. Here, he’s holding two variety of green bean seeds. I kind of like to play in the seeds, too.
It may seem like a pain to save seeds, but it feels really good to me. I like that self-sufficient feeling, and it really does save money in the spring. Plus, if there’s a zombie apocalypse, all you have to do is figure out how to keep the zombies from crashing your garden, and you’re all set!
This year’s going to be the fourth summer my husband and I do a big vegetable garden together. Right now, we have only the peas, carrots, potatoes, and onions in the ground, but in Maine, this is to be expected. It was pretty chilly until last week. Sometimes, I forget that growing up in Texas we were wearing shorts by May.
I’ve seen friends from other parts of the country post pictures on social media of food they’ve already grown in their gardens, and I feel confused at first because we just started planting. It’s almost surreal for me to see a fully-grown vegetable in May.
But I digress…
This post is supposed to be about my green thumb I thought I had.
The story goes like this.
Every year, even our first year of vegetable gardening, though we had some failures for sure, my husband I have had some pretty good successes growing food. We always have a good harvest, at least to me, and last year, we grew so much food that we were really able to see a cost savings on our grocery bills from late summer until early winter. That’s pretty good, right?
I post pictures to Facebook of our beautiful garden starting in early summer. The peas are ready to eat; the bean bushes look big and lush; the carrot and potato plants look big and healthy. I’m always so proud of this garden.
I do help my husband a lot. He definitely does the lion’s share of the work–tills by hand, gets the soil ready, fertilizes, waters, hoes weeds. Wait, why do I think I help a lot?
Well, I do plant, pull weeds, pick bugs off one at a time for hours on end, and help harvest. But as I write this down, I am realizing a deeper lesson I learned this week. I think my husband really is making all this good food happen. I thought I was helping more.
He has always had a green thumb and this love of plants that I didn’t understand until we had a garden. He’s got some real skill at making plants grow healthy and strong, and I envy it. I’ve always been horrible at plants. I’ve killed everything from roses to sunflowers to a wide variety of houseplants. I don’t think I’ve ever grown more than a weed successfully, and if I had tried to grow said weed, I probably would have killed said weed.
But, then, there was this beautiful garden. I thought I was helping to grow it. I thought my husband had somehow lifted the “curse” I had with plants. I thought I was becoming a good gardener, too.
This is a picture of one of our first gardens when it was first getting going. It’s so lovely. And, in case you’re wondering, that’s a gnome guarding the peas. It totally works! However, I recently learned some truths about my newly-found “green thumb.” I started some seedlings this year in the house—without my husband’s help in any way—and I found out that maybe I still have a long way to go in terms of gardening.
So, I’m guessing you can imagine that things didn’t go so well.
We always do well in our garden starting most of our plants from seed, but I wanted to try to get a few starters going this season of things we sometimes buy as plants from the local nursery–peppers, tomatoes, and such. Unfortunately, pretty much everything I started died!
I planted like 25 broccoli starters and about 20 tomato starters. Not a single one of them made it. I also planted several kinds of peppers, about 30 plants total. I have 6 plants that made it.
I’m not sure what happened. Mostly, between part-time work, homeschooling, and feeding both people and creatures three times a day, I would somehow forget to water the little plants every day. It would seem like I just watered them, and then, sadly, some would die. Apparently, I had not just watered them. <sigh>
But my greatest mistake came when I put the plants out in the sunlight to grow stronger during the day; on the fourth day, I forgot to bring the plants in at night. I lost every tomato plant that night! I woke up at like 4:00 in the morning that chilly, fateful night, realized what I had done, and went back to sleep with sadness and disappointment in my heart.
This is one of my 6 survivors. I have no idea what kind of pepper plant it is, and I don’t even care. I’m just so glad it’s still alive!
So, yeah, now I have 6 plants left, and I’m hanging onto them for dear life!
Ironically, this year, my husband is putting up a fence around our property, and, when I say he’s putting up a fence, I mean he’s digging hundreds of holes through rocky earth with a shovel and putting up a fence the old-fashioned way. It’s pretty epic!
So I’m working to get the garden planted while he puts up the fence. After my little experience with the starters, this is making me really nervous. But, so far, so good. I have battled the black flies and mosquitoes, tilled that garden with a shovel (one slow row at a time), and we have a few things in the ground. The peas look great. Nothing else has had time to grow, but it’s still early.
I’m optimistic, but it’s a cautious optimism. I’ve learned a hard lesson of late.
This baby duck loved the new pool, and I loved watching those babies play! I need to do a whole blog on those duckies. They are way more interesting that I imagined they would be.
We still have the kale, red beans, green beans, tomatoes, lettuce, and corn to plant, but, this afternoon, we took a break from the tilling and the sowing and the fence making and had a late lunch at Jimmie’s, bought a kiddie pool for the baby ducks, and watched them have a blast in the pool. I think my husband and I are both a bit worn out this week, as living the simple life can be a lot of hard word, so taking the afternoon off seemed to be the best medicine.
This weekend, however, is Memorial Day weekend, which is always the weekend we finish planting our garden. After discovering some truths about my gardening skills, I hope you’ll wish me luck. I’m going to need it!